

If you would prefer a PDF version of this post to read later PLUS a free guide on how to sell more without Facebook Ads click the button below:
Really?!? Eric, you do know that I am on the internet for hours upon hours. I have read them all…
Okay, I will admit, you MAY have heard of it but it is NOT the typical side hustle that you see scattered across the internet such as surveys…
Even better I detailed how I made some side cash on this hustle. This is a great side hustle for dads, moms, a starving college student…
Disclaimer: THIS IS NOT A GET RICH SCHEME! If you were hoping to become a millionaire by trying this out. Then please STOP NOW! Do not pass go, do not collect $200…
Bonus: At the bottom of this article is Sign Up to get a FREE Guide to help sell MORE Shirts without using Ads!
So here goes…
A Side Hustle You Probably Never Heard Of…
Sell T-Shirts Online
Hold up Eric! T-Shirts??? Really?!?
Yes… really. Follow along because I was skeptical too.
What if I told you that you could design T-Shirts without buying ANY equipment, didn’t have to worry about printing the shirts, or delivering them???? Your sole job was to design GREAT shirts and share them with the world.
Okay Eric I am beyond skeptical now…
Check out this 1 minute and 34 second video and have your mind blown. (I’ll wait)
Are you still skeptical???
Let me introduce you to the TeeSpring.com Side Hustle:
*I actually used TeeSpring and TeeChip but I will focus on TeeSpring for this article.
TeeSpring is a T-Shirt Print on Demand Company that allows anyone to design T-Shirts and then sell them easily on Facebook. The beauty of the company is that you can design as many shirts as you want and none of them are printed until you begin making sales. You get a slice of the sales with none of the hassle of overhead.
What’s even better??? TeeSpring has a TON of training materials that will guide you through the entire process. The training center has a massive amount of information to help guide you.

You may be asking yourself “Why would they create so much support?”
Well the answer is simple.
They WANT your campaigns to SUCCEED! They want you to succeed SOOOOOO much that they actually retarget potential buyers for you. And why???
The answer is even simpler, the more YOU succeed, the more money THEY make. It truly is one of the only win/win situations I know of.
Here are my results…

Nice right??? Are you ready??
Setting Up a Campaign
Starting a TeeSpring campaign is extremely simple. Probably too simple. So simple that your first shirt may look like this…
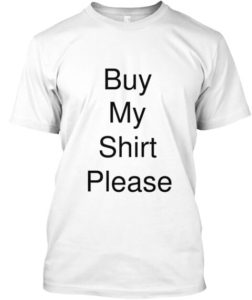
I whipped up this masterpiece in seconds…
I will admit. My first design most likely looked terrible! I don’t even remember what it was but I am sure it was. This side hustle takes WORK. See I told you this is not a get rich scheme. Here are some things that I learned to make a successful design.
First- You need to find a niche.
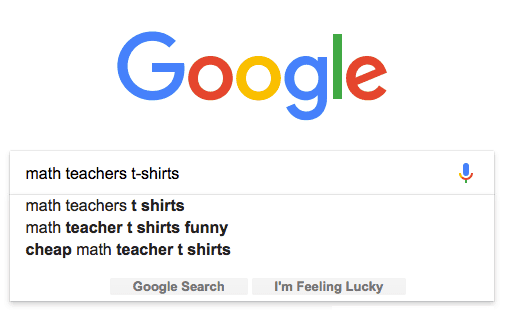
You CAN NOT skip this step. When you start you need to find your focus. You need to identify the group you are going to be making shirts for. At the time I was doing this side hustle my niche was educators. Then I went one level down to focus on specific types of educators such as math teachers or reading teachers. This allowed me to be laser focused on my design.
Second- You need a high quality design.
I am serious when I say that. It does not have to be complicated, it just needs to be GOOD! Spend some time searching TeeSpring for shirts that are killing it in your niche. It’s called doing “Market Research”.
Another great site to check out successful campaigns is https://www.teeview.org/
You can look at the latest added or best selling. This is a great place to see successful designs.
In Google, search your niche and check out the images out there. You will find a TON of ideas.

Pro Tip: If you can not design yourself out of a paper bag or just absolutely hate photoshop then you can hire out your design. Fivver or Freelancer.com are great places for designs. I had a lot more success with Freelancer but it does cost a bit more.
Okay now that you have your design you are ready to move on.
Building Your Shirt
As I mentioned it earlier, TeeSpring makes it super simple to get started.
Step 1: Click on Start Design and you will have the opportunity to select your product. T-shirts are our focus right now, so select that.
On this page you are going to want to pick “Art” and upload your own image.

From there you can select a variety of shirt types and colors. Pick your Shirt Type and Base Color(You can add more color choices on the next step)
Pro Tip: TeeSpring lets you know what the base price for that product is. The lower the base price the more room for profit there is. However, the cheaper the shirt the lower the quality of the shirt is. Think Hanes T-shirt versus a Premium T-shirt. My niche wears Hanes T-shirts so I wasn’t too worried. If your target niche is a bit “classy” then you may need to pick a premium T-shirt.
Pro Tip: You are creating a T-Shirt brand. If they buy one of your shirts and its crap, then they wont buy one of your next designs. But if your design is great, the shirt is great, then they are going to be interested in your next design AND they tell a friend! Holy Moly! We got a T-Shirt Business! Focus on quality.
Step 2: Play with the Profit Estimator
*It’s just fun…
TeeSpring has made changes over the years and you no longer need to hit your target for your shirts in order for them to be made.
Sweeeeeeet for you!
Before the change you could had to hit the target you set. Imagine if you set the target at 20 and received 19 sales. Under their previous system the shirts weren’t produced and you made ZIP! So this is a MUCH BETTER system now.
To start off my goals were always 20 shirts. Nothing special in that number, but I thought if I hustled I could hit that mark. I used the slider to give me an estimate on how much profit 20 shirts would give me. It would help me determine how much I was willing to spend in order to sell those shirts.
As I mentioned earlier, you can add multiple colors to your design. This will allow the buyer to select more than one. TeeSpring also added the feature to allow you to add different styles so you can add hoodies, woman’s styles, etc. Add as many as you would like depending on your audience.
Lastly set the price…
Price Setting Advice
Now don’t set the price to:
“One Million Dollars” spoken in Dr. Evil’s voice…
Remember that market research that we did earlier??? How much were those shirts selling for? BINGO. You are going to want to price yours around the same amount.
But who pays 21.99 for a T-Shirt?!?
Well I am sure someone did but here is a marketing trick that I used effectively to close the sale.
PROMO CODES!
Once you launch your Campaign you can add Promo Codes to your design. Lets say your base price is 21.99 but you know no one in their right mind will buy that shirt for 21.99. The shirt really should be priced at 17.99.
Soooooooo you add a 4 dollar off promo code and give that to your customer. Now your shirt is priced at 17.99 and they think “I just got this AMAZING shirt at 25% off!!! What a Sale!”
**By the way this is what all the stores do.**
Step 3 Add a Description
Like anything on the internet you want a Catchy Title that also targets your niche.
For your description remember your market research. Do not reinvent the wheel. Look at how the pros describe their shirts and what they add in their description and follow their lead.
Select the category and launch that bad boy.
Having a Successful Campaign
Ok you have a great design, your shirt is made now what… Facebook time!
So you have some decisions to make:
1. Am I going to spam all my friends and family and beg them to buy my shirt?
or
2. Am I going to target people on Facebook that might actually want to buy my shirts?
Unless one of your relatives is a millionaire and wants to buy a thousand shirts, I would recommend path number 2. If you do have a millionaire as a relative you can have him email me at [email protected] and we can chat…
Facebook Page and Facebook Ads
Facebook Page: Facebook ads are going to be one the quickest way to get your shirt in front of as many people as possible and you need a Facebook page to do that. You will be able to target your audience better and measure what it working.
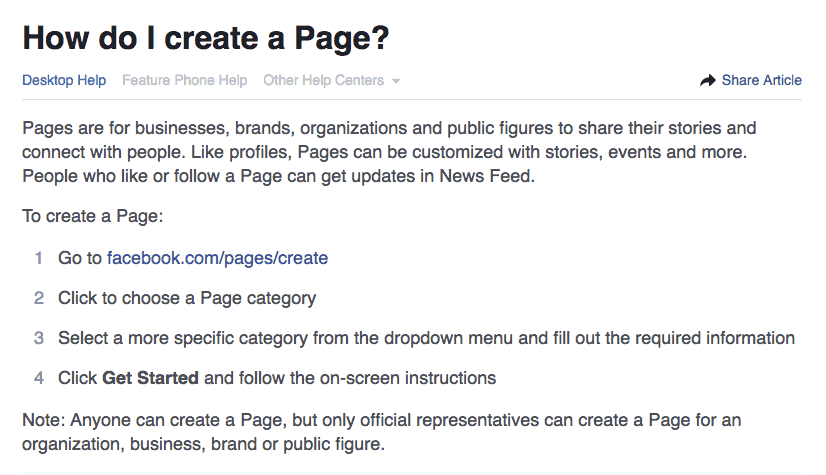
First thing you will need to do is create a Facebook Page.
Simple 4 step process!
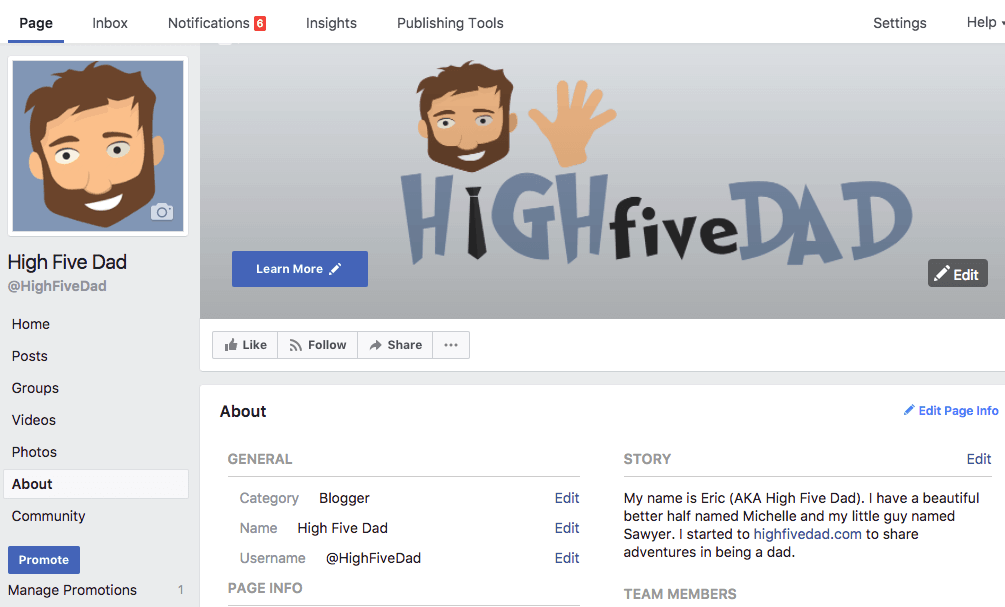
Remember treat this like your brand so fill out as much details as possible including an image and description. Check out High Five Dad’s Facebook Page. For now I just have my simple logo up as the cover and my avatar picture with my biography.
Facebook Ads:
Disclaimer: I want to warn you that this will not be an depth tutorial on Facebook Ads. This will give you enough instruction to be dangerous… Spend 10-15 minutes searching Facebook for a more in-depth look on ads.
Here is the link that will take you to Ads https://www.facebook.com/business/products/ads
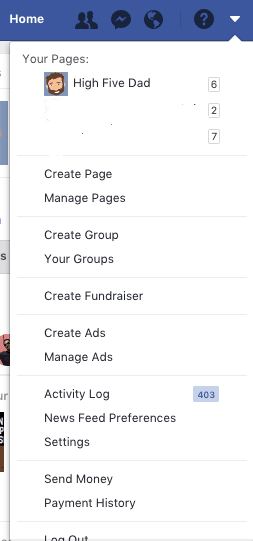
You can also click this button here on Facebook and then click Create Ads:
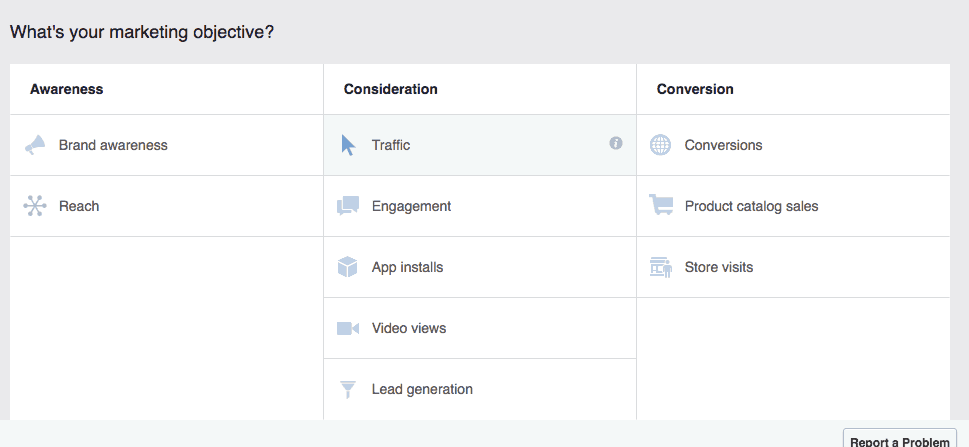
The next screen will bring you to the marketing objective. I will be honest, I found the most success with Traffic.
Ok here is where the magic comes in…
Facebook has a TON of people and a TON of information on those people and you my friend get to tap into it.
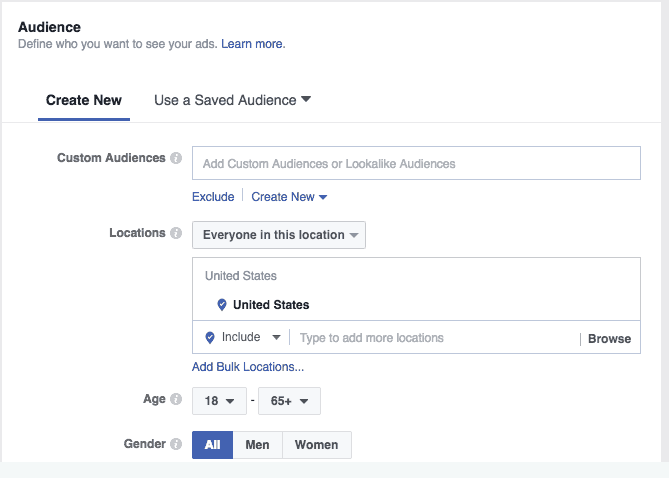
For my teacher Niche, I made sure the location was set to United States. It is not that other countries don’t have teachers, I just wanted a laser focus on a small target audience.
The age I focused on for my teacher niche was between age 25-55. Yes I am aware that there may be younger teachers and I am also aware there may be older teachers but again I wanted to target a very narrow group. If my sales exploded, THEN I would slowly start expanding my audience but for now, smaller is better.
Think about your niche. Is the majority male or female? Or is it an equal blend. For my niche, it was overwhelming female. So I limited my ads to just female.
My goal was to get this ad in front of the “right” female teachers age 25-55. Since teachers are usually facebook friends with other teachers, if my design was great they would share with their friends, which is FREE promotion!
Detailed Targeting
For me this is where I hit the jackpot! You can type in a bunch of demographics or interests but for me I targeted…
Job Titles!
When people sign up in Facebook, they sometimes add their job title to their profile. Check out this!!!

Depending on my shirt design I may add just First Grade Teachers or maybe a variety of grade levels.
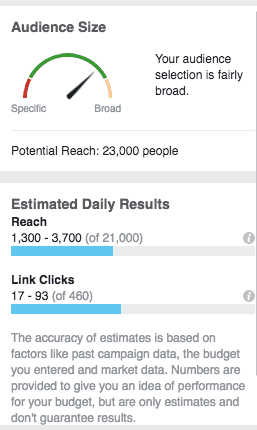
If you audience is TOO specific the need points to Red. Facebook’s butter zone is the Green.
Here is an audience with GREAT Potential.
Placement of Ads
Okay… This part may be controversial and others may find success differently but I wanted to share how I was successful. Facebook “Recommends” automatic placement. However I selected to Edit Placements.
I unchecked Right Column… Seriously Facebook does anyone actually click those?!?
The second thing I unchecked was Instagram. Here is my rationale:
Instagram has amazingly beautiful pictures. The ad that you are going to make… well it is not going to have a Mayfair Filter or have bokeh light sparkles etc. It just isn’t going to fit in. So unless you are going to spend time creating a great image to go along with your shirt, I would avoid Instagram.
Budget & Schedule
For the budget you have 2 options.: Daily Budget vs Lifetime Budget
Daily Budget is simple, you set how much you are willing to spend each day.
Lifetime Budget is how much you are willing to spend for the entire campaign.
I selected Lifetime Budget for 1 special reason… It allowed me to schedule the times the ad would run.
Understanding your niche is so important! Most teachers work from 7:30 to 3:30 ish. Why would I want my paid ad to be displayed during those hours? Even IF they pulled up Facebook during class and saw the ad, how many are going to say
“SWEEEEEET Shirt!!! Hold on class while I buy this….”
Not many.
So for my teacher niche I selected to run ads on a schedule and used the following time slots:
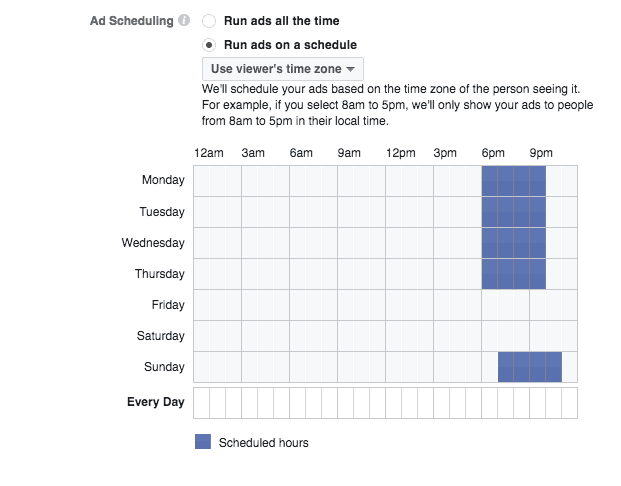
Monday-Thursday I ran the ads from 6pm-9pm. I did run them on Fridays when I first started but rarely did I make sales that day for teachers. Saturday was always slow for me. Sunday I shifted 7pm- 10pm. All of this absolutely made sense when you think about the teacher niche.
Teachers are most likely going to jump on Facebook after they get home and eat dinner. Friday, they just spent a week with students and are either out doing something to blow off steam or sleeping. Saturday is there one day off while Sunday they are working on lesson plans and jumping on Facebook to procrastinate in the evening.
That all may feel like a stretch but I tried various scenarios and this one was the best click through rate and conversion.
The AD
Wow are you exhausted yet?!? This is truly a side hustle but it works if you follow this process.
Alright the ad. You have a great design, a super narrow audience ready to buy your shirts now the last step… Creating the ad.
Paste your link in the URL section your ad will look something like:

Not terrible… But most likely will not convert too well.
You want to create a Catchy Headline and Description. Something that will draw their attention to your ad and make them want to buy the shirt. Also you will want to change your call to action from “Learn More” to “Shop Now”.
Lastly is the picture… I am no designer. I will admit it. However there are two options to make a better image than this.
Option One: In TeeSpring there are a handful of templates that allow you to change the default setting. You log into TeeSpring and click on your products. You will get a list of your designs. Click the Gear for the shirt your want to improve.
Scroll all the way to the bottom and select new Social Image. Like I said there are a handful of templates and you can also buy more. Whether you use the other templates or buy one they will surely look better than the wood background.

Yup she bought my shirt and so should you!!!
Option Two: Use Adfactory. This is free to use but just not as pretty.

Exclusive?!? And a Special offer??? Sign me up!!!
If you do option 1, you don’t have to do anything in Facebook. Just delete the URL wait about 10 minutes or so while TeeSpring does its internet magic and then re-paste your URL in the box. The new image will automatically pop up.
If you do option 2, click Use different image in Facebook and upload your sweet new image.
Last minute edits
The last thing you want to do at this stage is to have a spelling error or a grammar error. Spend a couple minutes making sure your description sounds good, title is spelled correctly, etc.
Finally hit confirm.
Congrats you have just launched your first T-Shirt Campaign. Now you just sit back and wait.
If you want some great FREE ways to increase your T-shirt sales check out below. If you need any help at all shoot me an email at [email protected].


Excellent article, Eric. How do you go about marketing your designs, is it just Facebook you use?
Hey Shaun! Thanks! Facebook Ads was the fastest way to get them out in front of people. Since I was actually in this niche, when I would go to conferences, I would have 3 or 4 designs ready and have other teachers where them. Then when people asked where did you get them, they had a business card with the info and the promo code. Too many times we forget to get out in the “real” world. 🙂
Great idea, Eric! This type of side hustle is actually pretty fun! I also like that it doesn’t have any upfront costs. If it doesn’t sell well, you simply don’t get paid. I like that, it’s kinda no pressure. Thanks for the great idea, and good luck with your new blog!
No problem. I am glad to see you taking action! By the way it’s a hilarious design! Let me know if your campaign is successful.
Eric this is super, watched the video and i like it. Seems like a super service which I will recommend 🙂